This post contains affiliate links.
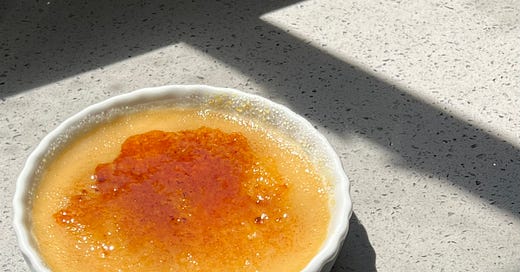
At a young age I came to the conclusion that crème brûlée was the pinnacle dessert of a fine dining experience. To this day, if there’s crème brûlée on a menu- I’m getting it. It’s so simple but just feels so luxurious. And cracking through the caramelized top is one of life’s simplest pleasures.
And while a vanilla bean crème brûlée is simple and amazing on it’s own. There are so many ways you can elevate this dessert and develop layers of flavor. Following the lead of Starbucks, PSL season is here. Pumpkin everything- even though the official start of fall isn’t for another month. I took a less in your face with pumpkin approach with this one. I infused Pyschocandy tea in to the cream and replaced granulated sugar with light brown sugar, for that warm fall vibe.
Pyschocandy is a tea blend from August Uncommon. It’s a rooibos tea with dried pumpkin, Turkish apple, caramel, blackberry leaf and vanilla. It first made it’s way on to my radar while working at Mr. Holmes- we had this plum tea danish with a Pyschocandy pastry cream. The smell alone had me hooked- it’s intoxicating. It embodies fall in a nuanced way.
By no means do you have to use this exact tea, you can use whatever you enjoy or have on hand. You also don’t have to infuse the cream at all.
Ingredients:
480 grams heavy cream
18 grams tea of choice
90 grams light brown sugar
85 grams egg yolks
a pinch of salt
Splash of rum
More sugar for torched tops
Directions:
Place your tea leaves in a tupperware or deli. Heat your cream ever so slightly- just until warmed and pour over your tea leaves. Allow to steep for 30 minutes. You do not want to boil your cream as we are trying to gently extract the beautiful flavor tea has to offer. If you have the time and patience (I do not) you could even cold steep over night.
Heat oven to 315F.
Strain out your tea leaves and reweigh your cream. Top off with enough cream to get back to 480 grams.
Place you cream in a saucepan over medium heat and bring cream to a simmer.
Meanwhile, whisk together the egg yolks, brown sugar and salt. Just until combined, we don’t want to introduce too much air.
Temper your hot cream into the yolks mixture by gradually adding 1/3 of the cream at a time. Whisk in the first addition to ensure the eggs don’t scramble. Then switch to a rubber spatula for the last two additions. Once again we don’t want to add too much air.
Optional- but strain your custard base in to a measuring cup/pitcher. JUUUUST INCASE. It’ll get rid of any scrambled bits.
Place your 6 oz ramekins into a deep baking dish, at least into a dish that’s an inch deep.
Pour the custard in to the ramekins filling about 2/3rds of the way full.
Place the baking dish in the oven BEFORE adding HOT water to the baking vessel. This will help limit how much you’re moving the pan full of water around and decrease the risk of any water spilling into the ramekins. The hot water bath (bain- marie) ensure gentle and even heat while baking.
Bake for 20-25 minutes until just set- there should still be slight wobble in the center but not a jiggle.
Carefully remove the ramekins from the water bath. I use tongs for this. You do not want to leave them in the hot water bath as this will continue to bake the custard resulting in an over baked/scrambled product with an eggy taste.
Refridgerate until fully chilled. Usually will prep the the day before and chill overnight.
To finish evenly coat each custard with a thin layer of granulated sugar. Use a torch to caramelize the sugar, You’ll want to hold the ramekin at an angle and slowly turn it in your hand while torching for even caramelization. Be sure not to leave the flame in one place for too long or this will cause the custard to melt and blend into the sugar and PLEASE be careful.
Allow the top to fully set. Crack and enjoy.
*If you don’t have a kitchen torch you can also use the broiler to caramelize the sugar or pour over a thin layer of dry caramel and allow that to set*


